Healthcare
  Education
  Real Estate
  Logistic
  Themes
 Plugins
 Patterns
App Store Connect User Management: A Beginner’s Guide

As an administrator, in iOS App Store Connect you have the ability to assign roles and permissions to users. Let me explain in detail how you can add a user and specify their level of access. The level of access provides different types of capabilities and features to the user and you should assign the roles accordingly. This feature is especially useful for large iOS app development teams and projects with multiple versions and components.
let’s get started.
Access App Store Connect to Add Users:
Log in to your App Store Connect account by visiting the App Store Connect website (https://appstoreconnect.apple.com).
Navigate to “Users and Access”:
Once you’re logged in, you’ll see a top bar (Desktop View) or a left sidebar (Mobile View) on the screen. Click on ‘Users and Access’ or ‘Users and Access > Users’ to access the user management section.
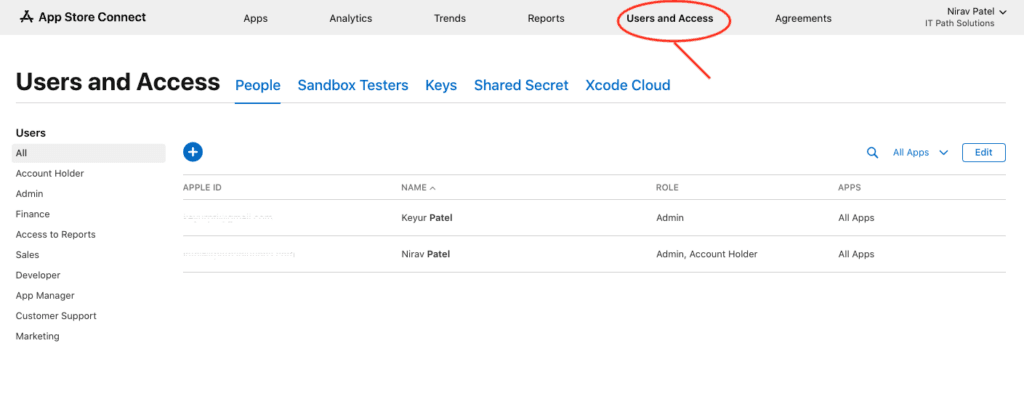
Fig. 1: ‘Users and Access’ Section in the Top Bar of the Screen
Click the “+” Button:
In the “Users” section, you’ll find a “+” (plus) button, usually located near the upper-right corner of the screen. Click this button to initiate the process of adding a new user.

Fig. 2: “+ Button to Add New Users in the App Store Connect Portal
Fill Out User Information:
A form will appear where you need to provide information about the new user. Here’s what you’ll typically need to enter:
First Name and Last Name: The user’s full name.
Email Address: The email address associated with the user’s Apple ID. This email will be used for sending the invitation.
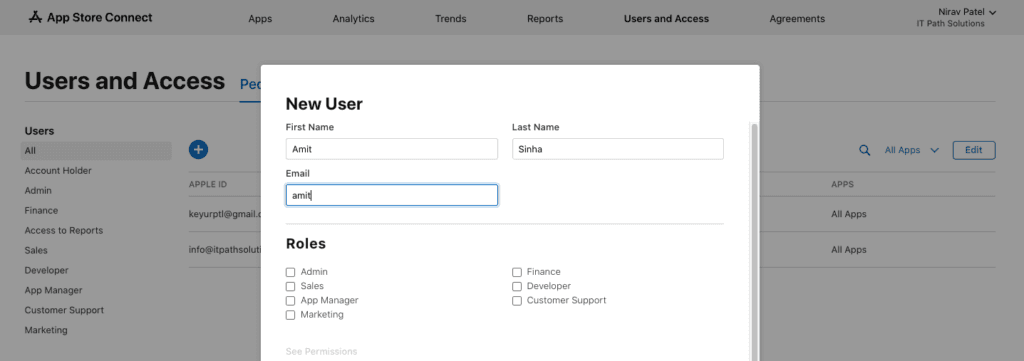
Fig. 3: User Details Form Required to Add a New User
Choose User Role:
In the same form, you’ll need to specify the user’s role. The role determines the level of access and permissions the user will have within your App Store Connect account. Here are some common roles:
Admin: Has full access to all features and settings, including the ability to add and remove users, manage apps, and view financial reports.
App Manager: Can manage apps, app details, and user access but does not have full access to account settings.
Developer: Primarily responsible for creating and managing app builds and profiles.
Choose the role that best fits the responsibilities of the new user.
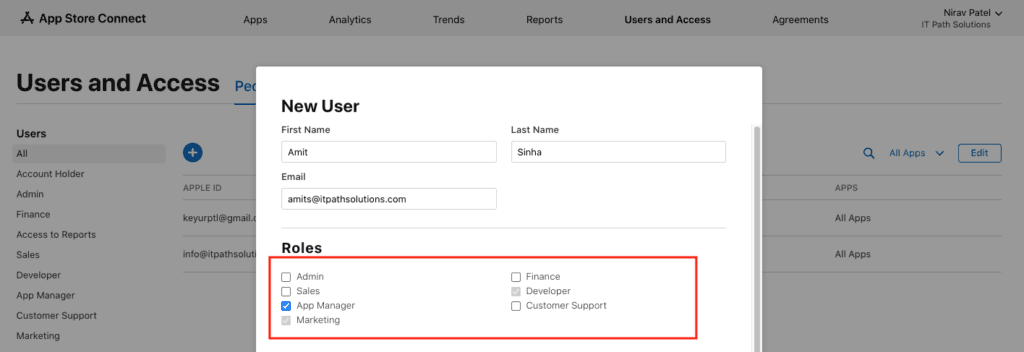
Fig. 4: Select the Roles of User
Specify App Access and Permissions: Access to Certificates, Identifiers & Profiles:
Certificates: Certificates are a crucial part of iOS, macOS, watchOS, and tvOS app development. They are used to sign your apps and prove their legitimacy to Apple and end-users. Granting a user access to certificates allows them to manage and create these certificates. This includes distribution certificates for App Store submissions, development certificates for testing, and more.
Provisioning Profiles: Provisioning profiles determine which devices can run your app during development and distribution. Users with access to provisioning profiles can create and manage these profiles. This is important when you’re developing and distributing apps to testers, clients, or through TestFlight for beta testing.
App IDs: An App ID is a unique identifier for your app. Users with access to App IDs can create, manage, and configure these IDs. This is essential for configuring app services like push notifications, in-app purchases, and more.
Granting a user access to these resources is typically reserved for developers, as they need these permissions to build, sign, and distribute apps.
Access to Resources and Help:
Financial Reports: This permission grants access to financial data related to your apps. Users with this access can view financial reports, including sales and earnings. This is important for those who handle financial aspects of app distribution, such as finance or accounting teams.
Agreements: Access to agreements involves managing legal agreements and contracts between your organization and Apple. Users with this access can accept and review these agreements, which include terms and conditions for app distribution. Legal or administrative team members often need this access.
Help Resources: This includes access to documentation, support, and resources provided by Apple. Users with this access can seek help and guidance from Apple’s official resources. It’s beneficial for anyone involved in app development and management, including developers, administrators, and project managers.
Access to App Store Connect API:
The App Store Connect API allows for programmatic interaction with your App Store Connect account. mobile app developers with access to the API can automate various tasks, such as uploading builds, managing testers, or retrieving app data. This is typically used by developers or teams that want to streamline and automate their app deployment and management processes.
When adding a new user and specifying their app access and permissions, it’s crucial to carefully consider their role and responsibilities within your organization. Only grant the permissions necessary for them to perform their tasks effectively. Limiting access to sensitive resources like certificates and financial reports helps enhance security and protect your app-related data. Regularly review and update these permissions as roles and responsibilities change within your team.
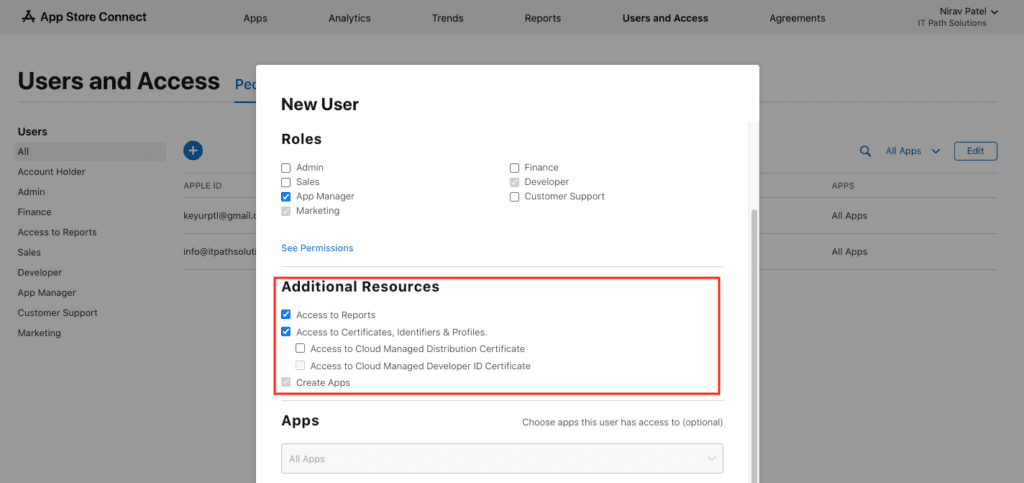
Fig. 5: Adding Additional Resources Option (e.g., Certificates, Access Reports)
Send the Invitation:
After filling out the necessary information, click the “Invite” button. This action sends an email invitation to the specified email address.
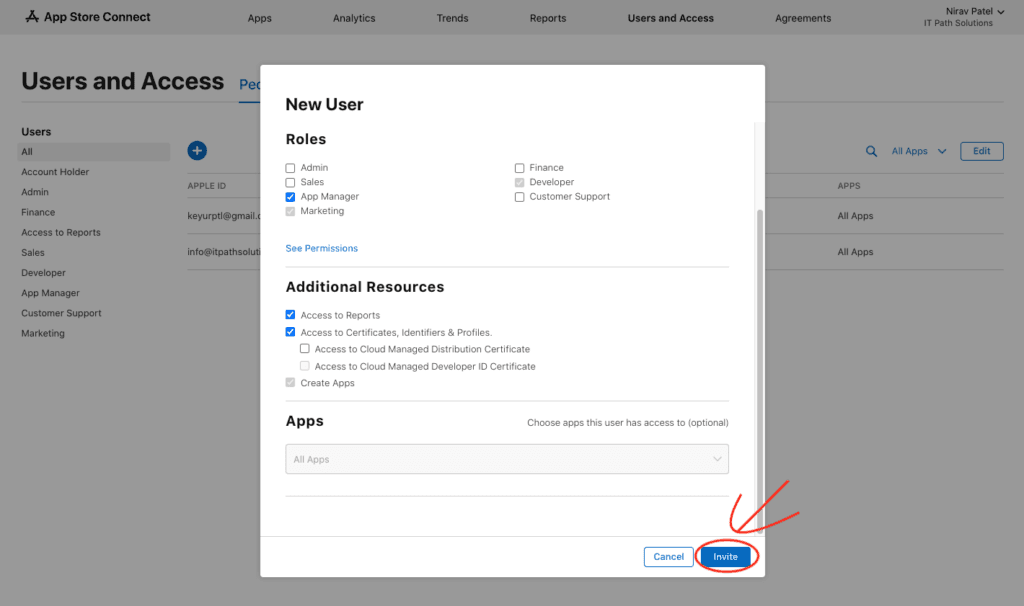
Fig. 6: Invitation Sent to Newly Added User
User Accepts Invitation:
The invited user will receive an email containing an invitation to join your App Store Connect account. They should open the email and follow the instructions to accept the invitation.

Fig. 7: Invitation Email Received by the New User
Confirmation and Management:
Once the user accepts the invitation, their name and role will appear in your App Store Connect account under the “Users” section.
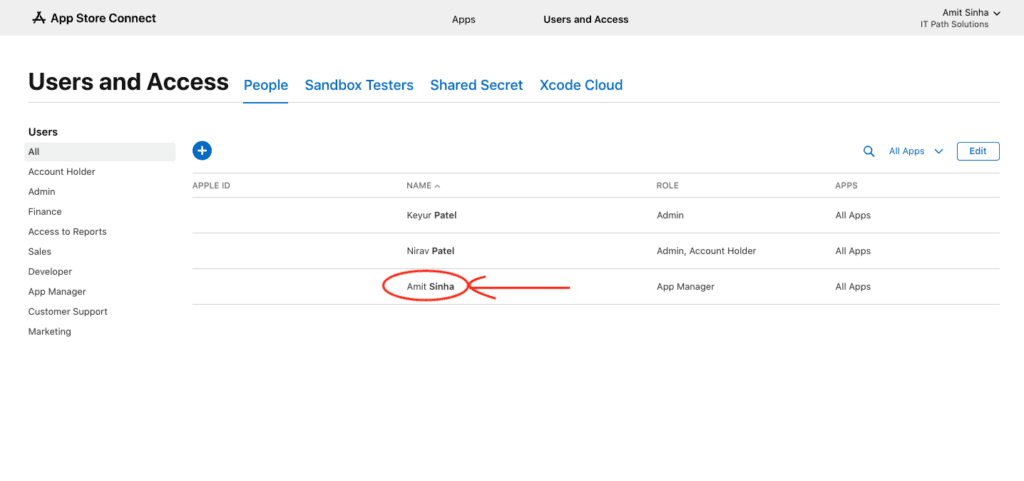
Fig. 8: Confirmation of User Added in the ‘User and Access’ Section
Modify Permissions (Optional):
You can further manage the user’s permissions by selecting their account in the “Users and Access” section. This allows you to adjust their role, app access, and other permissions as needed.
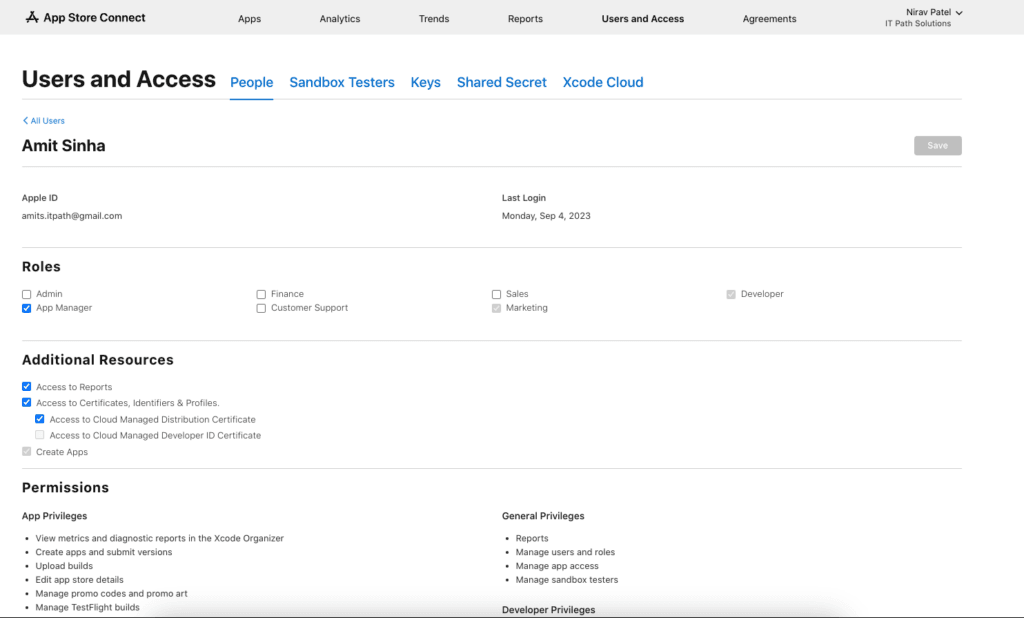
Fig. 9: Modify and Manage User Roles
Remember that the level of access you grant to users should align with their responsibilities and the principle of least privilege. Only provide the access necessary for them to perform their tasks effectively, and regularly review and update permissions as needed to maintain security and proper management of your apps.
Conclusion
By assigning a specific role, you can enhance the security and authenticity of your app and prevent unauthorized accesses and changes by only providing roles as per the team member’s requirements and needs. This prevents overlap between users and their activities and ensures the integrity of your app. If you have a complex custom iOS project in mind and want to get the opinion of our expert developers to categorize and organize your custom project, do drop us a line below to get started.