

Simple Way to Create A Google Maps API Key

Keyur Patel
September 12, 2025
6 min
Last Modified:
October 13, 2025
Google maps is the most popular web mapping platform offered by Google. With Google maps, people can get maps view, directions and satelite view of the entire world. Google maps has now become the default directions guide across the world.
Google Maps API Key
The API key allows you to communicate your map pin and securely communicate with the Google platform from your integrated map. As such correctly setting up and integrating a Google Maps API key is an important step for integrating Google Maps in your website. Each integrated map will have a unique API key.
Without this unique key, you cannot show Google Maps on your site.
Google Maps Platform products are secured from unauthorized use with the aid of proscribing API calls to people who offer right authentication credentials. These credentials are withinside the shape of an API key – a completely unique alphanumeric string that associates your Google billing account together along with your project, and with the precise API or SDK.
This manual shows you the way to create, restrict, and correctly use your API Key for Google Maps Platform.
Before you begin
To integrate Google Maps into your website or application, you’ll need to obtain Google Maps Platform credentials. This includes an API key that allows your application to securely communicate with Google’s mapping services. Each integrated map requires a unique API key to function properly.
Before you start using the Maps JavaScript API, you need a project with a billing account and the Maps JavaScript API enabled. To learn more, see Set up in Cloud Console.
Here is the simplest way to create google map API key and enable Billing for your project:
Steps to create a new API key
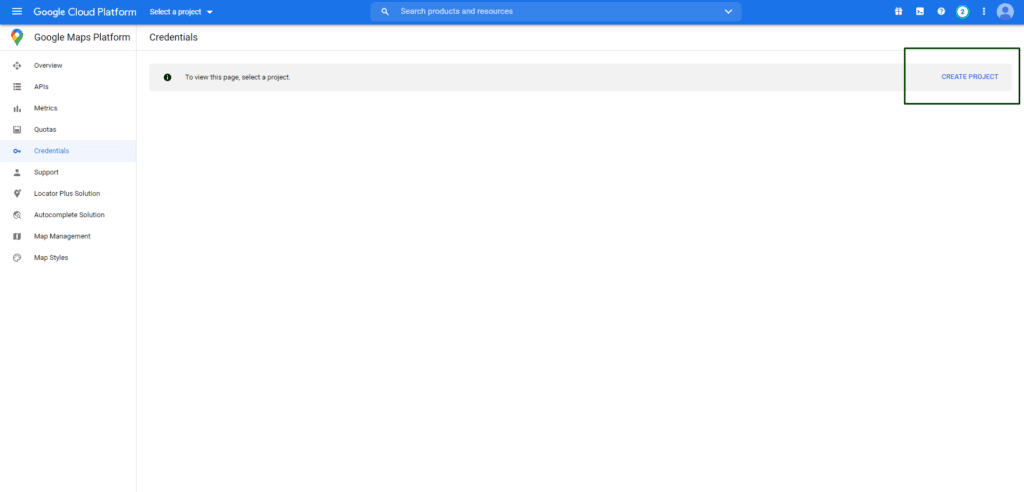
- Go to the Google Maps Platform
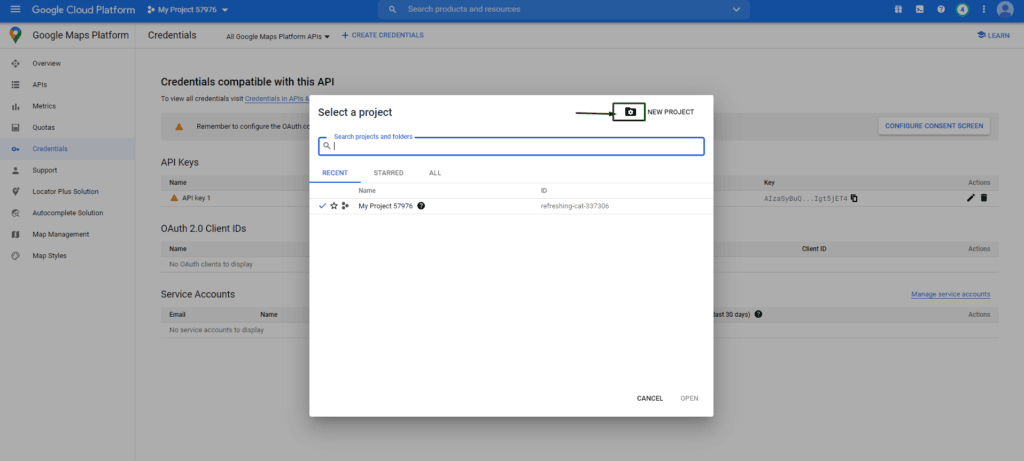
- If you want to use an existing project, please select it from the list.
Otherwise, select ‘CREATE PROJECT’ in the upper right corner and enter a project name.
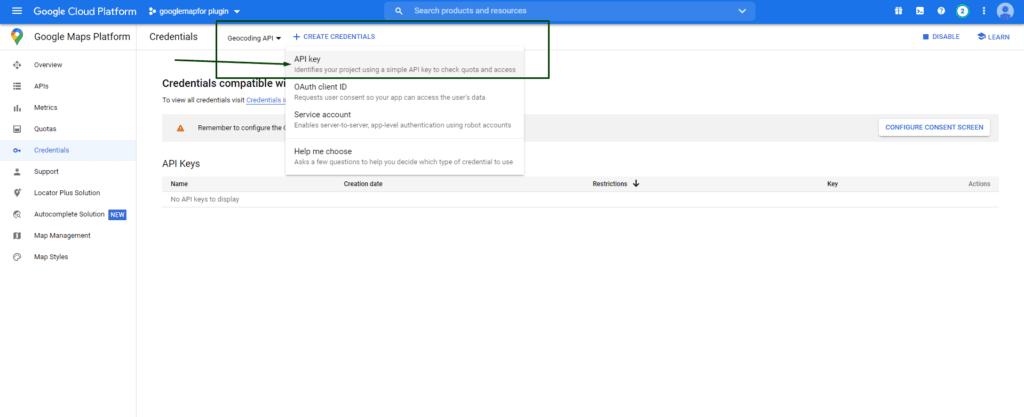
- You can now see the list of the APIs with description of each, click on the API whatever you want to create, in my example I am going to create a Geocoding API.
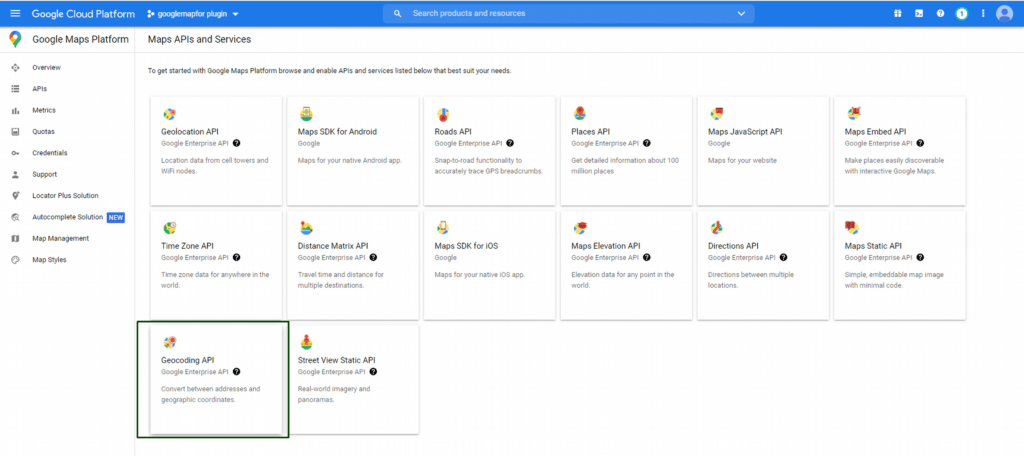
- To use the API you need to enable it.
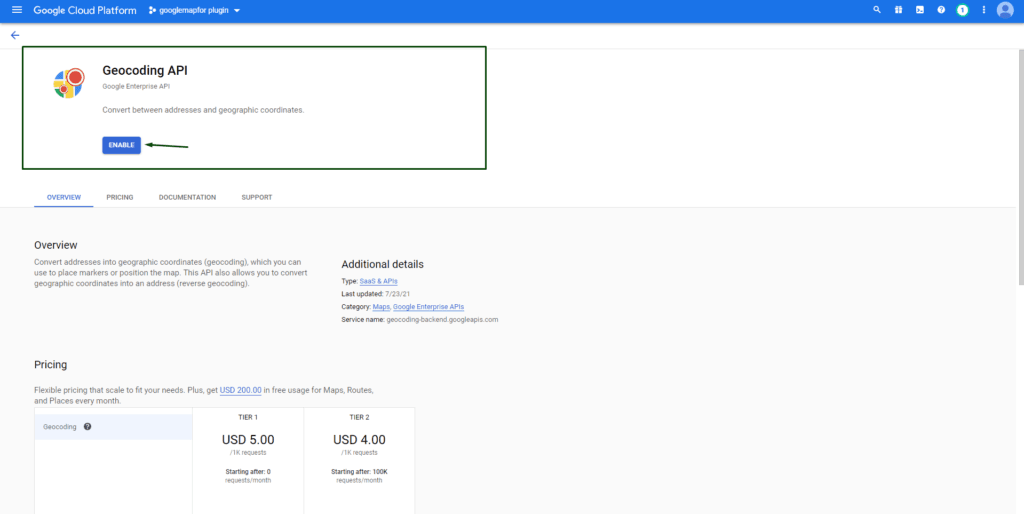
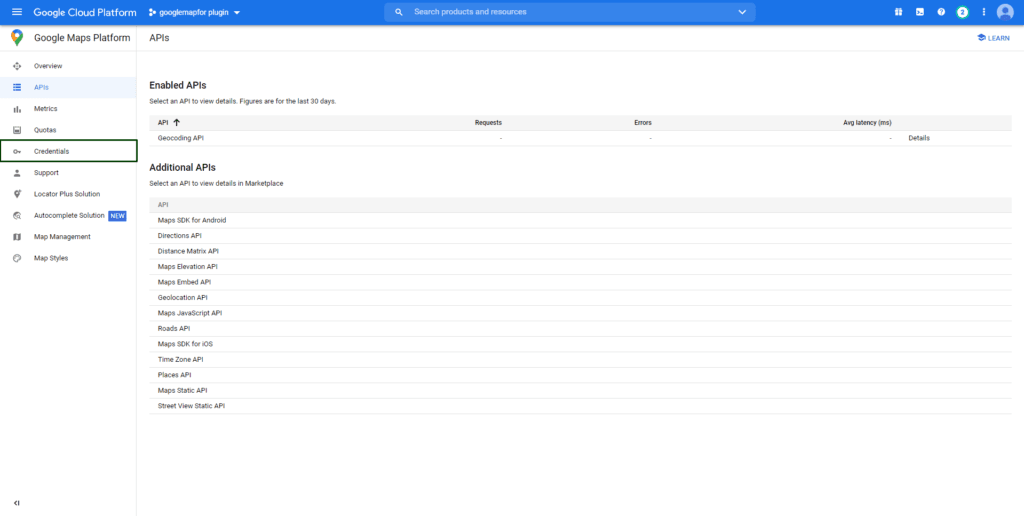
- Once you’ve enabled your API, click on the Credentials to create credentials to get an API key.
- Click Create credentials and select API key. You will see a new dialog that displays the newly created API key.
- Once you’ve generated an API key, the final step is to enable billing for that API key, as google charges for each API call. (https://developers.google.com/maps/billing/gmp-billing)
- Now you need Billing details to make Google API work on your website. (https://developers.google.com/maps/billing/gmp-billing)
View your existing API keys
- Go to the Google Maps Platform
- If the side menu is not visible, click the three-line (hamburger) menu icon
- Click ‘APIs & Services’ (API icon)
- Click ‘ Credentials’ (key icon)
If the above steps aren’t clean sufficient then please observe the educational video from the Google Maps Platform Team below. This video will show you the way to generate and limit API keys.
Why to secure an API key:
When you use API keys on your applications it might publicly exposing your API keys can cause unauthorized spending in your account. To secure your API keys, follow these practices:
-
- Do not keep API keys in files inside your project’s source tree. If you keep API keys in files, hold the files out of the doors of your project’s source tree to assist make certain your keys do now no longer become part of your source code control system. This is specially essential in case you use a public source code control gadget consisting of GitHub.
- Do not use API keys directly in code. API keys that are used in code can be disclosed to the public. For example, you may forget to remove the keys from code that you share. Instead of embedding your API keys in your applications, store them in environment variables or in files outside of your application’s source tree.
- Set up application and API key restrictions. By adding restrictions, you can reduce the impact of a compromised API key.
- Delete unneeded API keys to reduce publicity to attacks.
Here is the simple steps to how you can secure your API key:
API key restrictions:
API keys are unrestricted by default. Unrestricted keys are insecure because they can be used by anyone from anywhere. For production applications, you should set both application restrictions and API restrictions.
API keys are unrestricted by default. Unrestricted keys are insecure due to the fact they may be utilized by all of us from anywhere. For production projects, you should set both application restrictions and API restrictions.
How to add API key restrictions:
- Navigate to the APIs & Services→Credentials panel in Cloud Console.
- Select the name of an existing API key.
Adding application restrictions
Application restrictions specify which web sites, IP addresses, or apps can use an API key. Add application restrictions based on your application type. You can only set one restriction type per API key.
Choose the restriction type based on the needs of your application.
- Use None for testing purposes only.
- Use HTTP referrers for API clients that run on a web browser, so that only the specified pages can call the API. These types of applications expose their API keys publicly, so we recommend using a service account instead. See the Adding HTTP restrictions section below for examples.
- Use IP addresses to limit API key access to certain IP addresses.
- Use Android apps for Android applications. This option requires adding your package name and SHA-1 signing-certificate fingerprint.
- Use iOS apps for iOS applications. This option requires adding at least one iOS bundle identifier to restrict API calls to specific iOS bundles.
Adding HTTP restrictions
API keys used by web applications should have HTTP restrictions. To add HTTP restrictions:
- Select HTTP referrers (web sites) in the Application restrictions section.
- Input at least one restriction in the Website restrictions section.
- If your domain supports both HTTP and HTTPS, both restrictions must be added separately.
- You can optionally use wildcard characters (*) for the subdomain and/or path.
Adding API restrictions
API restrictions specify which APIs can be called using the API key. All API keys used by production applications should have API restrictions.
To set API restrictions:
- In the API restrictions section, click Restrict key.
- Select all APIs from the dropdown that your API key will be used to access.
- Click Save.
Per project limits
You can create 300 API keys per project. This is a system limit, and cannot be changed using a quota increase request.
If more API keys are needed, they should be shared across multiple projects.

Keyur Patel
Co-Founder
Keyur Patel is the director at IT Path Solutions, where he helps businesses develop scalable applications. With his extensive experience and visionary approach, he leads the team to create futuristic solutions. Keyur Patel has exceptional leadership skills and technical expertise in Node.js, .Net, React.js, AI/ML, and PHP frameworks. His dedication to driving digital transformation makes him an invaluable asset to the company.
Related Blog Posts

DevExpress Web Reporting: A Complete Guide to Browser-Based Reporting

Laravel vs Django vs NestJS: The 2026 Backend Framework Comparison